

Custom made floor tiles came into the market during the era of marbles and granite. And its usage spread across the world very rapidly. Starting from ceramic tiles, it has grown currently up to PGVT (Polished Glazed Vitrified Tiles) and it’s available at cheaper cost compared to natural stones. By using tiles, flooring work becomes easier and comparatively quicker. Besides, floor tile comes in many sizes, colors and finishes. They add beauty to your living space.
Earlier, you could find some gaps while joining the tiles, then came joint free tiles. Now, you have tiles as large slabs like marbles and granite available in the market.


4 key points to ensure quality during installation
When you install floor tiles, the quality of the installation work has to be good to get aesthetics and functionality right. Here are a few key points to note to ensure quality during floor tile installation.
1. Selection of tile
The size, design, colour, and texture of ceramic floor tiles shall be as laid down in the drawing or as specified. It shall be of appropriate grade/ group and shall conform to surface quality, dimensions, physical, chemical & thermal properties as specified.
2. Cement
Normally you can use all grades of cements for fixing tiles. Cement sand paste is more preferred than that of neat cement paste. Because, it may cause shrinkage problems leads to cracking of tiles and leaching of lime. Sand used shall be of passing 100 microns.
3. Laying
Before taking up the laying of tile, make sure to complete the below mentioned works:
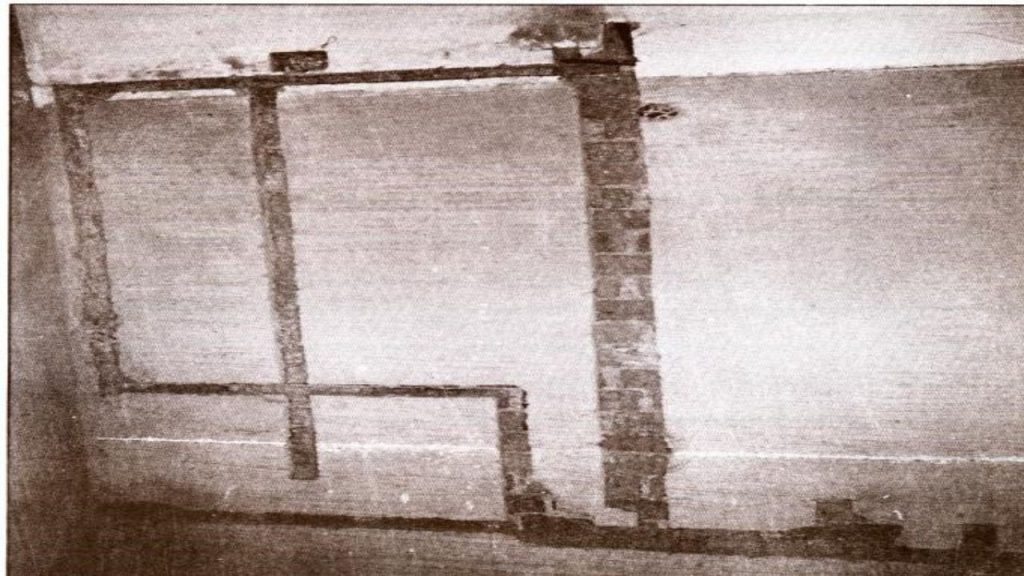
- Laying of services like cement, pipes, conduits, etc
- All plumbing and electrical works
- Plastering of inside/outside walls, ceiling, fixing of doors and windows
- Whenever slope in finished floors is desired, mark the points of level and outlets correctly. Also, make the outlet opening made before the flooring is taken up

Laying of tiles on floors, walls, etc. involves the below points:
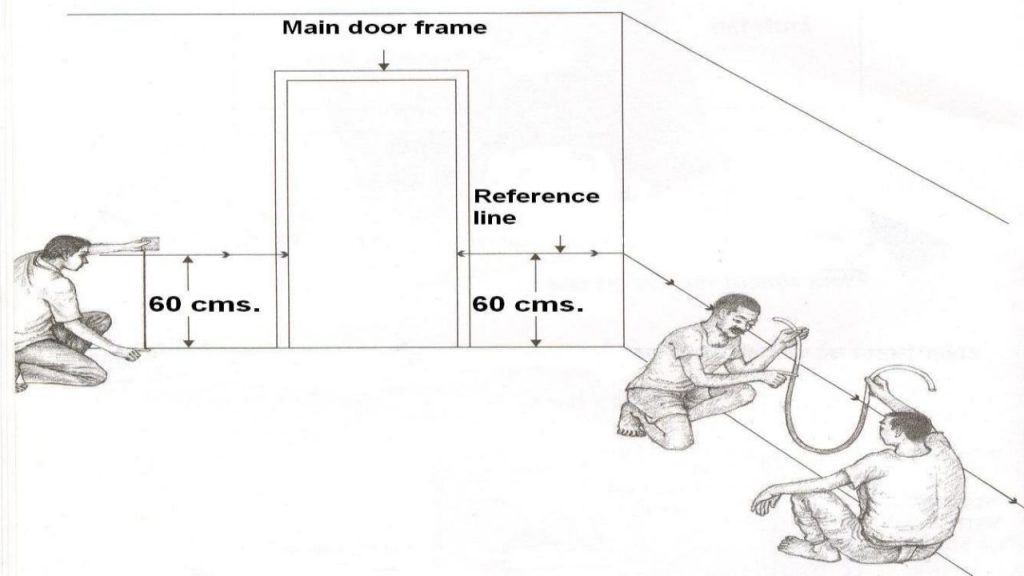
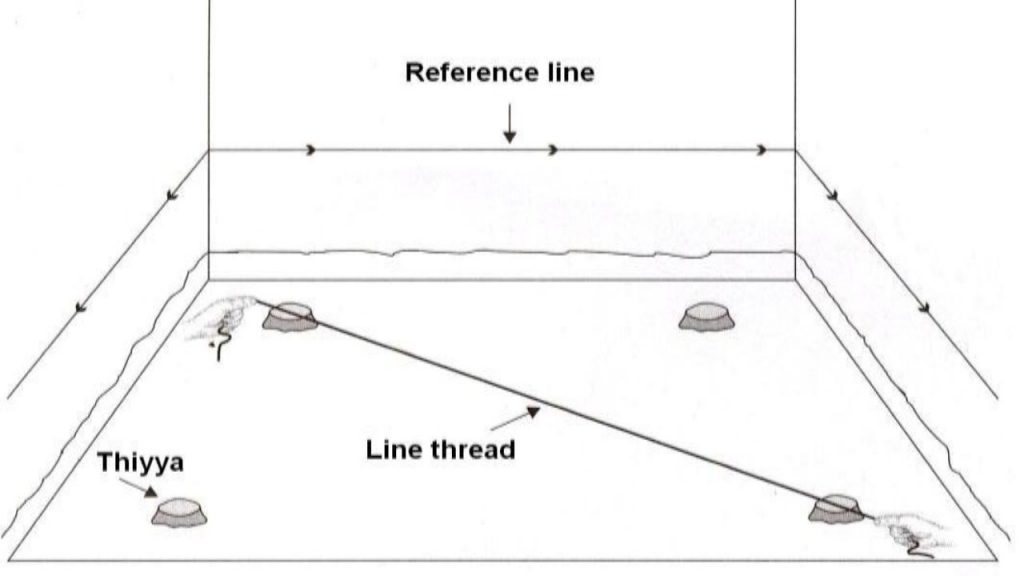
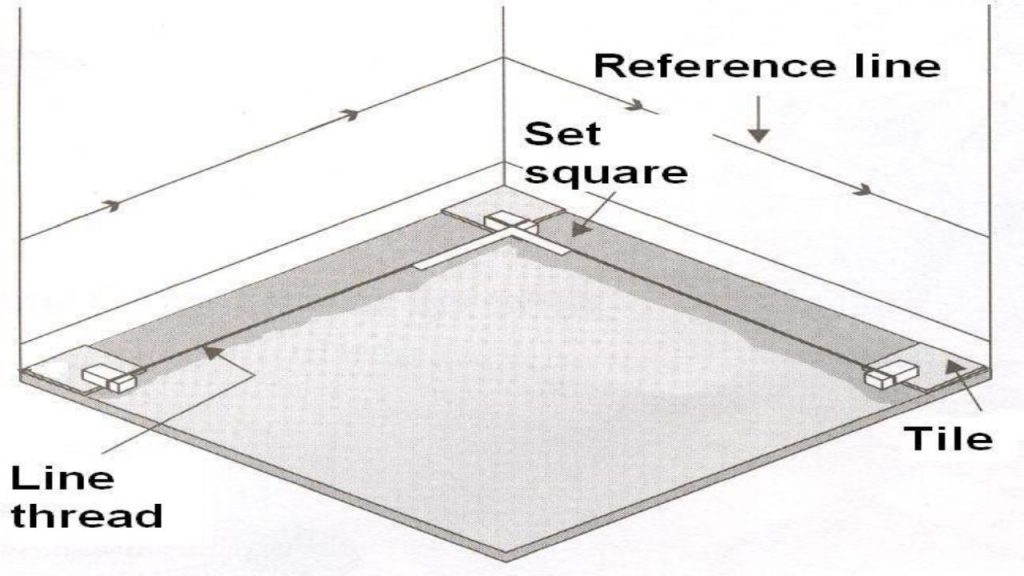
a. Marking of reference and level lines
After completing the above-mentioned works, mark a reference line on room walls. On the basis of this, you can consider the required slope and their thickness and establish a level for subgrade, mortar bed and the tile-finished surface. Thereafter, transfer or mark the respective level lines on the walls with the use of line thread and indigo.

b. Preparation of sub-grade
Flooring laid on the ground floor is the base concrete and flooring laid over structural slab is the cushioning layer. Base concrete is of either lime concrete or cement concrete of specified mix with the thickness of 100mm. Cushioning layer shall be of a specified mix and having thickness of 40mm. Slope desired in the floor finish shall be provided in the sub-grade concrete.
In this case, you shall lay the base concrete with top-level corresponding to reference line marked on the wall.

c. Laying of mortar bed
Over properly laid sub-grade, you can spread the mortar layer evenly and smoothly with the use of screed battens/floats for preparation of bed for laying of tiles. You can use both the cement mortar as well as lime mortar for this purpose. Keep the average thickness of the mortar bed as specified (normally 20 mm with thickness at any place not less than 10 mm).
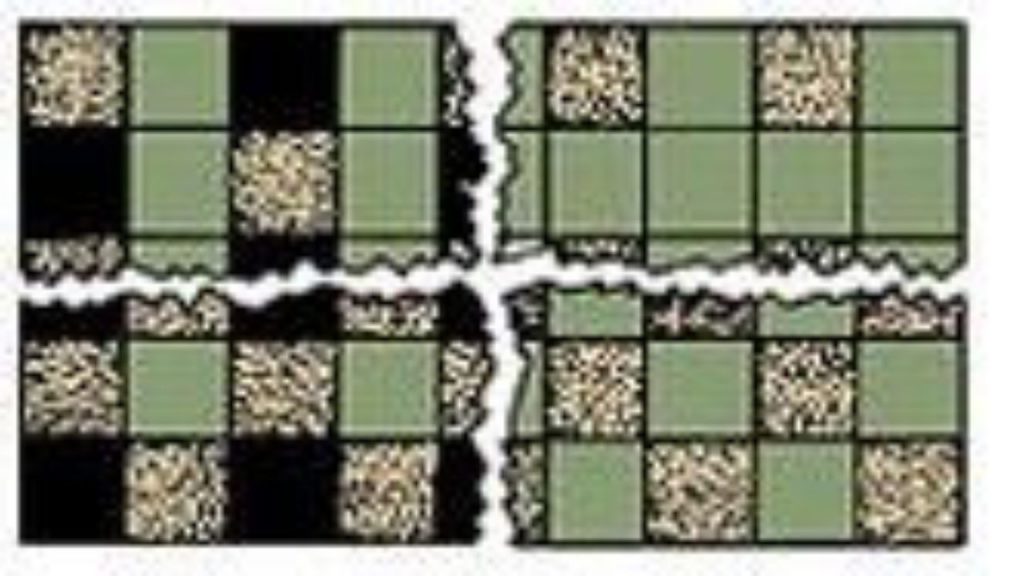
d. Plan/pattern for floor tiles application
Before fixing the tiles, it is essential to lay them out in the desired pattern. Also, make sure that they give an acceptable blend of colour and design/pattern. Then, study the tile patterns and plan laying pattern. If the tiles are all one colour, plan the pattern according to the grain. Either alternate run of the patterns (as shown), or patterns in one direction can be chosen. Whichever pattern you choose, plan it in advance.

e. Laying of floor tiles
Fix the tiles either by dry or wet fixing. In dry fixing, fix the tiles by using conventional cement mortar. In wet fixing, you can do this work with special adhesives which fix tiles directly on the existing flooring.
For laying of tiles, first of all, ensure that the corners are square. If it is not, then from the corner, which is accurately square, snap/mark perpendicular lines at one tile length or width of edge tile, away from both the adjacent wall with the use of square and thread line.

How to do?
- After making square line, we will start the tile laying. First of all, fix the starting tiles corresponding to the tile top reference line. Then, recheck the top level of the bedding with the help of line thread & tape.
- Now, spread the cement slurry of honey-like consistency (normally @ 4.5 kg/sq. m) over the mortar bed, over such an area at a time as would accommodate about 20 tiles.
- Use cement and sand mortar in the ratio of 1:1 or 1:2 or as specified. Add some water to create a consistent paste. Do not use neat cement for fixing tiles.
- Fix the dried tiles in this grout one after the other, each tile being gently tapped with a wooden mallet till it is properly bedded and in level with the adjoining tiles. Keep the joints as close as possible and in straight lines. The joints between the tiles shall normally be 1·5 mm wide.
- After the tiles have been laid in a room or the day’s laying work is completed, clean the surplus cement slurry and the joints. Also, wash fairly deep with the help of a broomstick. Clean the cement slurry before it sets hard preferably with the use of saw-dust.
- The day after the tiles have been laid, clean all joints of the cement grout with a wire brush or with the point of trowel to a depth of 5 mm and any loose cement, dirt or dust in the joints shall be removed. The joints shall then be filled with cement grout of the same shade as the colour of the matrix of the tile.
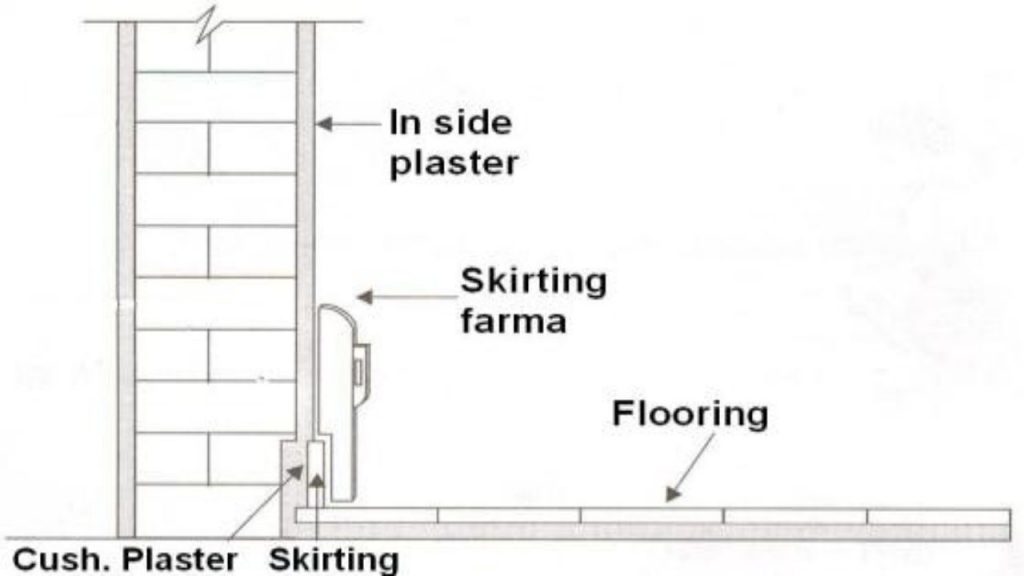
f. Fixing of skirting or dado tiles
Skirting and dado tiles shall be fixed after the laying of the floor tiles installation. The portion of the wall to be tiled shall be left un-plastered.

g. Curing
After fixing tiles, it should be kept as moist and it should be kept constant for 7 days to set the bending and joints properly. After this, slight traffic is allowable. Heavy traffic is allowed only after 10 days.
4. Quality Checking
After complete cleaning, levels, air spacing, edges, pointing, neatness, all finishing works including cutting and molding needs to be verified.
That’s it! Ensuring the above mentioned points will ensure quality of your tiling work. Share your thoughts below.